
 I typically begin a termite inspection on the exterior of the home. The exception is when it’s raining and I don’t want to track mud inside—in that case, I’ll start in the attic. Most of the time, though, the inspection begins with diagramming the house.
Creating a diagram is a critical step. It serves as a snapshot of the home’s condition at the time of the inspection, documenting termite activity (past and present), fungus, wood damage, areas of concern, and inaccessible sections. I use this same diagram during treatments and follow-up inspections, so it’s essential that anyone from my company can clearly locate areas of activity by referencing it.
If a customer is considering fumigation, I’ll measure the home using a wheel for accuracy. If they tell me they have no interest in fumigation, I’ll pace off the measurements instead. Each step equals three feet. On my diagram, each square represents two feet, so there’s a fair amount of math happening in my head—six steps equals eighteen feet, or nine squares. Occasionally, customers follow along during this process. This is one of the moments where I may seem a bit antisocial, but there’s a reason: accuracy matters.
Once the diagram is complete, I begin probing all of the lower wood using a shorter pole. I walk the perimeter of the home, tapping each wood member. If a board cracks open and termite droppings spill out, that’s a clear sign of drywood termites. I also tap wooden windowsills. If the wood feels like it’s shrinking or compressing, that typically indicates fungus. I still tap (very lightly, so not cause more damage than necessary) fungus-damaged wood because termites will sometimes infest these areas. Sometimes tapping can cause droppings to fall, even when the wood member I tap doesn’t crack. When that happens, it tells me termite activity is nearby.
I scan patio posts, stair framing, railings, closet framing—anything made of wood—for signs of termite or fungus damage.
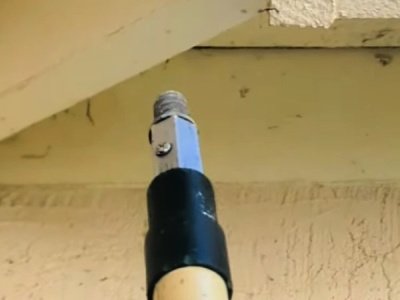
After finishing the lower areas, I move on to the second-story eaves, probing them with a longer pole.
As I circle the home, I’m also watching for signs of subterranean termites along the foundation, specifically mud tubes extending from the soil up the face of the foundation toward the sill or stucco line.
If portions of the eaves are above the roofline and inaccessible, I scan the roofline for termite droppings. For wood I can’t physically reach, I look for surface imperfections and signs of excess moisture. Moisture is always a key indicator—all wood destroying organisms stem from it.
If the home has wood siding, I carefully scan the walls for paint bubbles. Sometimes those bubbles are hollow, but other times they’re filled with termite droppings.
Whenever I find termite damage, I still need to determine whether it’s caused by drywood or subterranean termites. Clean, smooth damage filled with droppings points to drywood termites. Damage that contains droppings mixed with dirt and appears more channelized is typically caused by subterranean termites.
When inspecting a home’s exterior, I constantly remind myself to slow down. I try to limit my schedule to two termite inspections per day so I can take my time. It’s amazing what can be missed when an inspection is rushed. Earlier in my career, I worked for large termite companies that scheduled up to five inspections a day. There simply wasn’t time to be thorough. When that happens, inspectors tend to lean toward fumigation. Managers often justify this by saying it’s the most effective option and that you can’t see inside walls—but I can’t help but think the real reason is volume. More inspections mean more sales.


1 thought on “Inspecting a Home’s Exterior for Termites”
Pingback: Elementor #9259 - California Termite and Pest Control